How do I add an additional IP to the server?
How do I add an additional IP to the server?
After ordering an additional IPv4, it must be manually added to the server.
CentOS 6/7
Connect to the server via SSH, go to the /etc/sysconfig/network-scripts/ directory and create the ifcfg-eth0:0 file:
cd /etc/sysconfig/network-scripts/
vi ifcfg-eth0:0
To start editing a new file, press the i key
We add the following data to the new file:
DEVICE=eth0:0
ONBOOT=yes
BOOTPROTO=static
IPADDR=109.234.39.1
NETMASK=255.255.255.0
Instead of 109.234.39.1, specify your additional IP.
After editing the file, exit the vim editor - press CTRL+C and enter the command ZZ or :wq!
Restarting the network service:
service network restart
If everything is done correctly, the new IP will be available in an instant.
CentOS 8
Connect to the server via SSH, go to the /etc/sysconfig/network-scripts/ directory and create the ifcfg-ens3:0 file
cd /etc/sysconfig/network-scripts/
vi ifcfg-ens3:0
To start editing a new file, press the i key
Adding the new IP data to the new file:
DEVICE=ens3:0
ONBOOT=yes
BOOTPROTO=static
GATEWAY=109.234.39.1
IPADDR=109.234.39.10
NETMASK=255.255.255.0
Instead of 109.234.39.10, we specify our additional IP, instead of 109.234.39.1 - its gateway.
After editing the file, exit the vim editor - press CTRL+C and enter the command ZZ or :wq!
Launching the alias
ifup ens3
Please note that it is the main interface of ens3, not ens3:0, otherwise an error will occur
Error: unknown connection '/etc/sysconfig/network-scripts/ifcfg-ens3:0'
In the case of using the VestaCP control panel, we can add an additional IP in a few clicks:
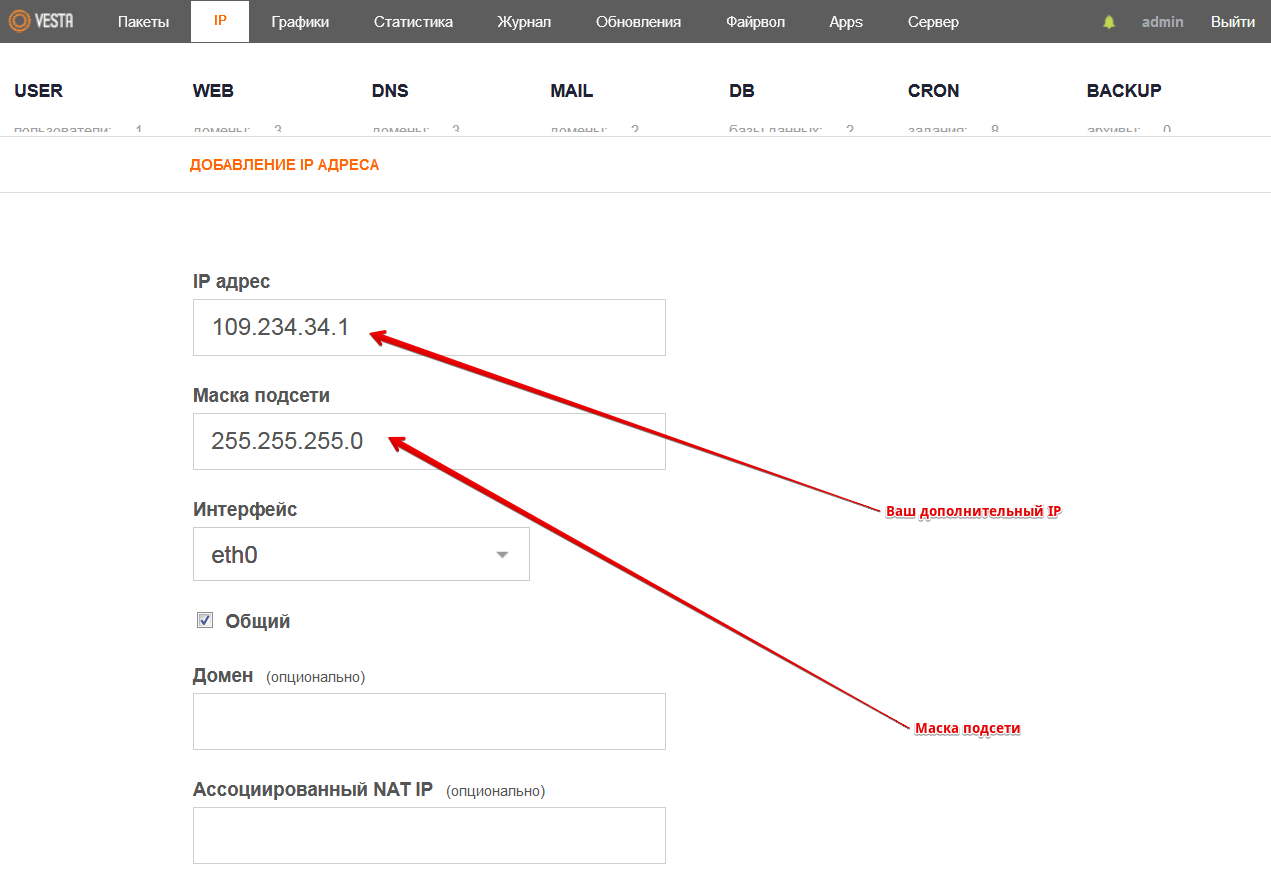
We fill in only the fields that are shown in the screenshot, we can leave the rest empty.
Debian/Ubuntu
We connect to the server via SSH and make changes to the /etc/network/interfaces file:
vi /etc/network/interfaces
Please note the name of our network interface, it is indicated in the lines:
allow-hotplug ens3
iface ens3 inet static
In our case, this is ens3, add the following lines to the end of the file. To start editing a file, press the i key
auto ens3
iface ens3 inet static
address 109.234.34.1
netmask 255.255.255.0
Specify the name of your network interface instead of ens3, and your additional IP instead of 109.234.34.1.
After editing the file, exit the vim editor - press CTRL+C and enter the command ZZ or :wq!
We reboot the network service and in a moment we will be able to access our additional IPv4 address.
/etc/init.d/networking restart
Ubuntu 18.04, 19.04 and 20.04
We connect to the server via SSH and make changes to the file /etc/netplan/01-netcfg.yaml
vi /etc/netplan/01-netcfg.yaml
The initial settings look like this:
network:
  version: 2
  renderer: networkd
  ethernets:
    ens3:
      addresses: [ 94.103.83.39/24 ]
      gateway4: 94.103.83.1
      nameservers:
          addresses:
              - "8.8.8.8"
To start editing a file, press the i key
We bring the file to the following format:
network:
  version: 2
  renderer: networkd
  ethernets:
    ens3:
      addresses: [ 94.103.83.39/24, 95.142.45.241/24 ]
      gateway4: 94.103.83.1
      nameservers:
          addresses:
              - "8.8.8.8"
Where 95.142.45.241 is an additional dedicated IP.
After editing the file, exit the vim editor - press CTRL+C and enter the command ZZ or :wq!
Checking for errors:
netplan try
If there are no errors, then apply the settings by pressing Enter.
Windows
Open the Control Panel -> Network and Sharing Control Center, select Change adapter settings:
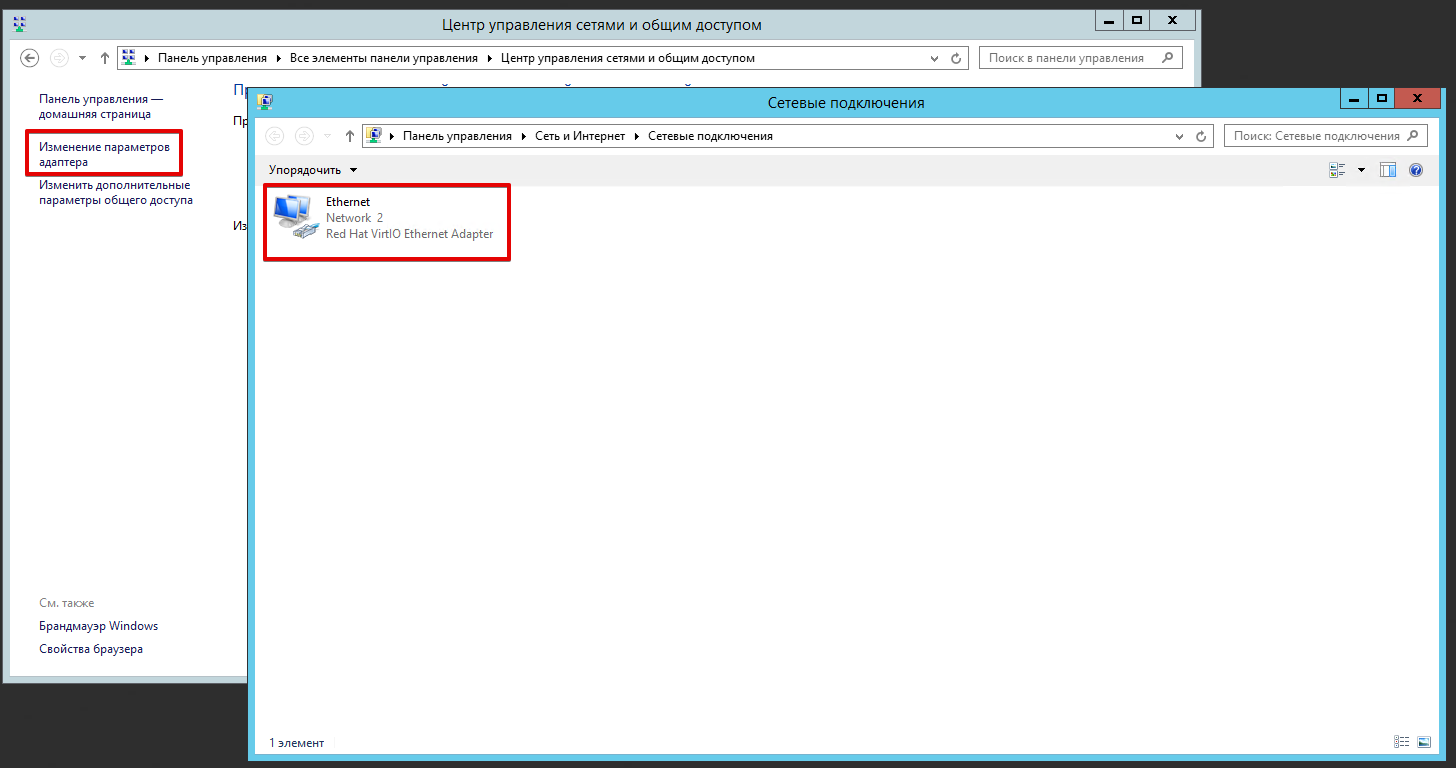
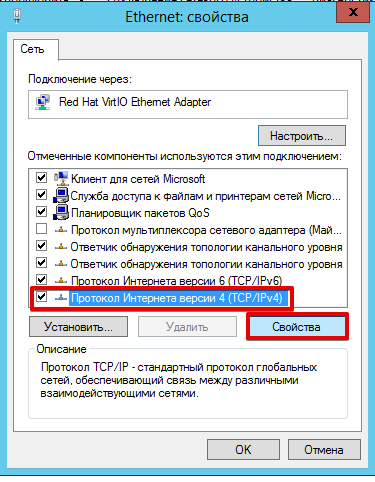
Right-click on the existing connection and select "Properties". Next, select "Internet Protocol version 4 (TCP/IPv4)" and click on the "Properties" button again:
In the window that appears, click on the "Advanced" button:
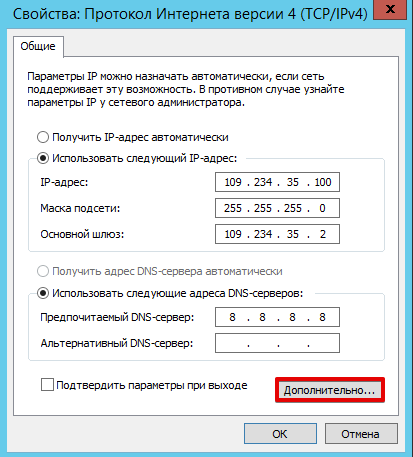
We proceed to adding an additional IPv4, after which we save the changes:
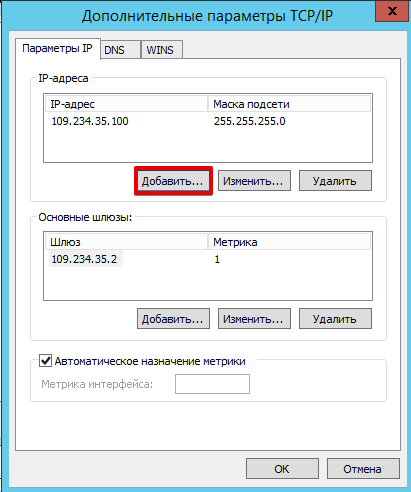
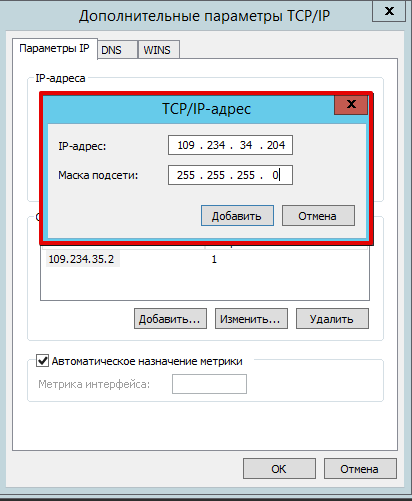
Instead of the IP shown in the screenshot, specify your additional address.


